If you used the DigiCert® Certificate Utility for Windows to create your CSR instead of the Barracuda SSL VPN user interface, see Barracuda SSL VPN: Certificate Installation with the DigiCert® Certificate Utility for Windows for instructions on how to install your SSL Certificate.
Barracuda SSL VPN: Installing Your SSL Certificate
If you have not yet created a Certificate Signing Request (CSR) and ordered your certificate, see Barracuda SSL VPN – CSR Creation.
How to Import the SSL Certificate to Your Barracuda SSL VPN Device
After we have validated and issued your SSL Certificate, you are ready to upload the files to your Barracuda SSL VPN device.
-
Log into the Barracuda SSL VPN device web interface.
For example: https://sslvpn.example.com:8443
-
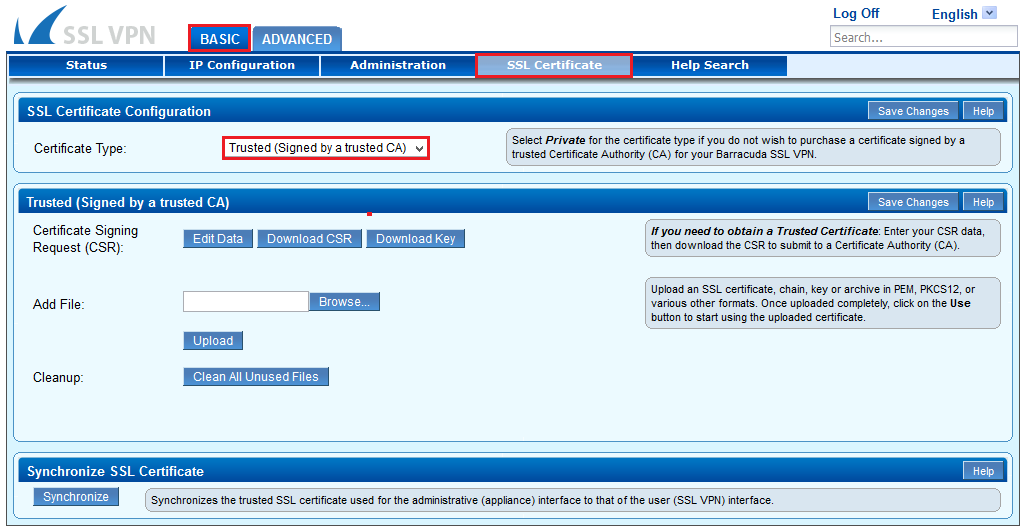
In the SSL VPN Web Interface, click Basic > SSL Certificate.

-
On the SSL Certificate page, in the SSL Certificate Configuration section, in the Certificate Type drop-down list, select Trusted (Signed by a trusted CA).
-
In the Trusted (Signed by a trusted CA) section, upload the following certificate files:
-
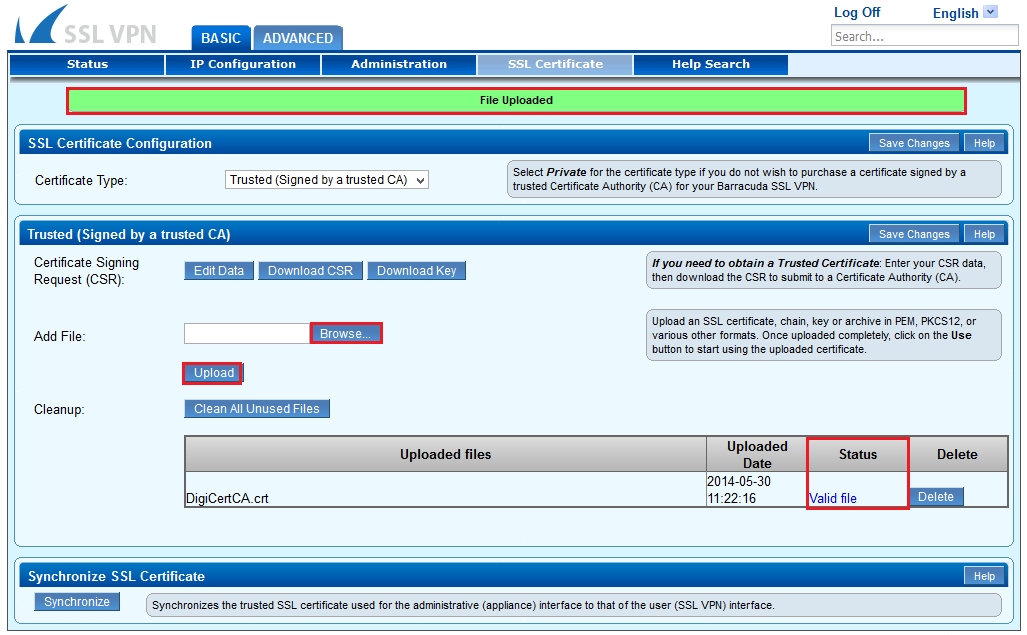
To the right of Add File, click Browse to browse for and select the DigiCertCA.crt file and then, click Upload.
After you receive the “File Uploaded” message in the green bar at the top of the page, upload the next file. Note that the Status of the uploaded file should be Valid file.

-
(Optional) In some cases, you may need to upload the private key file (private_key.txt) that you downloaded when you used the Barracuda SSL VPN web interface to generate your CSR.
To the right of Add File, click Browse to browse for and select the private_key.txt file and then, click Upload.
After you receive the “File Uploaded” message in the green bar at the top of the page, upload the next file. Note that the Status of the uploaded file should be Valid file.
-
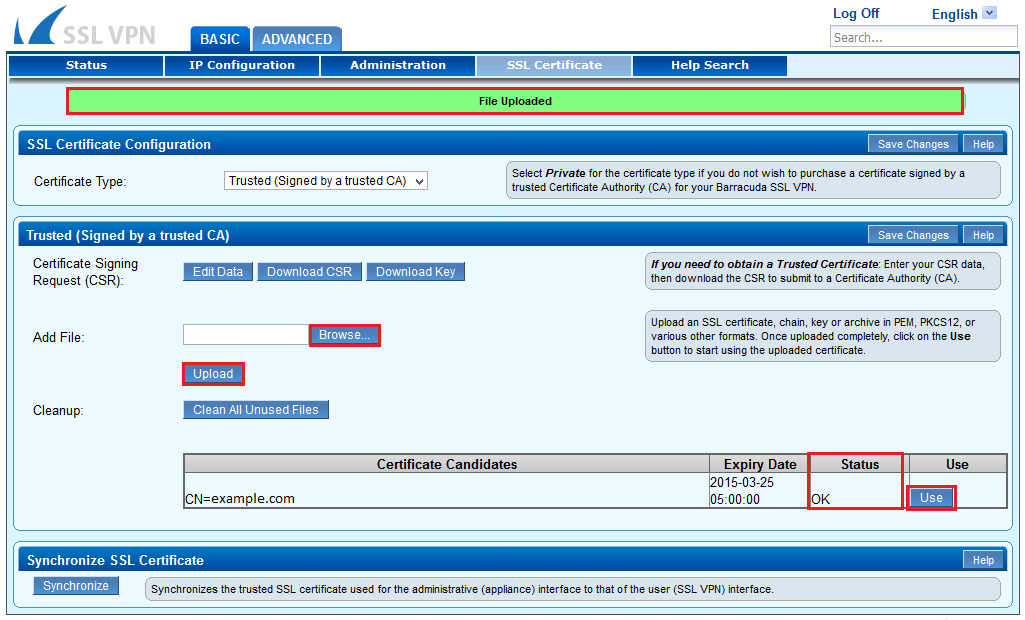
To the right of Add File, click Browse to browse for and select the your_domain_com.crt file and then, click Upload.
After you receive the “File Uploaded” message in the green bar at the top of the page, move to the next step. Note that the Status of the uploaded file should now be OK.

-
-
When you are finished, click Use.
-
In the Synchronize SSL Certificate section, click Synchronize.

-
You have now successfully installed your SSL Certificate on both the device and the SSL VPN web interface.
Test Your Installation
If your website is publicly accessible, our DigiCert® SSL Installation Diagnostics Tool can help you diagnose common problems.